
Introduction
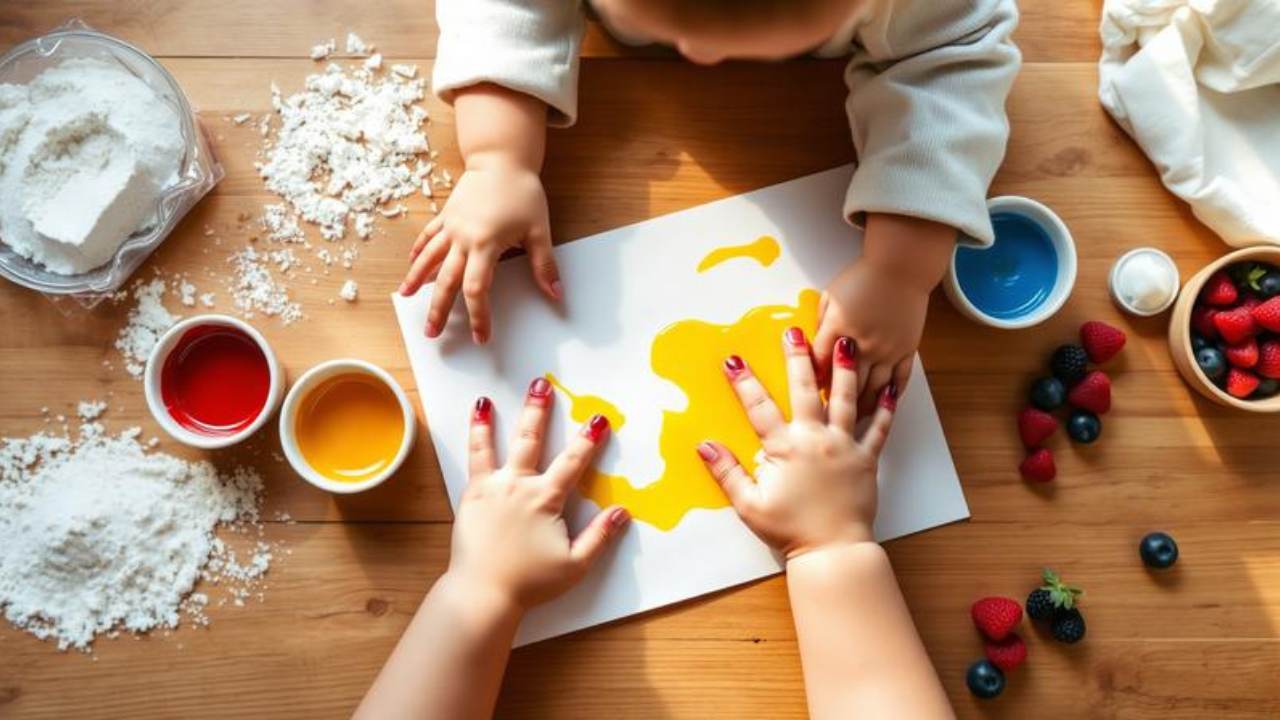
Picture this: your toddler is gleefully finger-painting on the kitchen table, their little hands covered in bright, beautiful colors. Then, without warning—straight into the mouth it goes. If you’ve ever panicked over your child eating paint, you’re not alone.
Commercial paints, even those labeled “non-toxic,” often contain undisclosed ingredients, preservatives, and pigments that may include toxic metals like cadmium, lead, and nickel. For parents of babies and toddlers who explore the world through taste, this is a real concern.
But what if you could let your little ones paint to their heart’s content—without a single worry about what ends up in their mouths? What if you could decorate cookies, cakes, and even cocktails with edible art that’s as delicious as it is beautiful?
This article delivers exactly that. You’ll learn what edible paint is, why it matters for safety and creativity, and most importantly, seven foolproof recipes to make your own edible paint at home using simple pantry ingredients. From no-cook options to natural vegetable-based colors, we’ve got you covered. Let’s dive in.
What Is Edible Paint?
Edible paint is exactly what it sounds like: paint made entirely from food-grade ingredients that are safe to consume. Unlike traditional art paints—which contain pigments, binders, solvents, and preservatives that are not meant for human consumption—edible paint uses ingredients you’d find in your kitchen.
At its core, edible paint typically consists of three components:
-
A base that provides body and texture (such as yogurt, cornstarch, flour, or powdered sugar)
-
A liquid that helps achieve the right consistency (water, milk, or even vodka)
-
A colorant that gives the paint its hue (food coloring, fruit/vegetable juices, or spice powders)
The result is a spreadable, paintable substance that dries on surfaces like paper, fondant, or cookies, but remains completely safe if accidentally ingested.
The Difference Between Edible Paint and Regular Paint
| Feature | Edible Paint | Regular Paint |
|---|---|---|
| Ingredients | Food-grade, kitchen staples | Chemicals, pigments, solvents |
| Safety | Safe if swallowed | Toxic if ingested |
| Use | Food decoration, kids’ art | Paper, canvas, walls |
| Drying time | Varies (1–3 hours) | Varies |
| Storage | Refrigerate, lasts days to weeks | Room temperature, lasts months to years |
Edible paint has gained popularity among parents of young children, cake decorators, and even mixologists looking to add artistic flair to cocktails.
Why It Matters / Benefits
Making your own edible paint isn’t just a fun weekend project—it offers genuine benefits that commercial paints simply can’t match.
1. Complete Peace of Mind for Parents
For babies and toddlers, everything goes into the mouth. Commercial paints, even those labeled “non-toxic,” don’t have to disclose all their ingredients, and scientists know that paint pigments can contain toxic metals. With homemade edible paint, you know exactly what your child is putting in their mouth—because you put it there yourself.
2. Safe for Sensory Play
Sensory play is crucial for child development, and painting is one of the best ways to engage little ones. Edible paint allows even the youngest children—as young as six months old—to explore textures, colors, and creativity without risk. As one parent described it, “萬一小孩不慎把顏料放進口中也不怕” (“even if a child accidentally puts the paint in their mouth, there’s nothing to fear”).
3. Endless Creative Possibilities for Baking
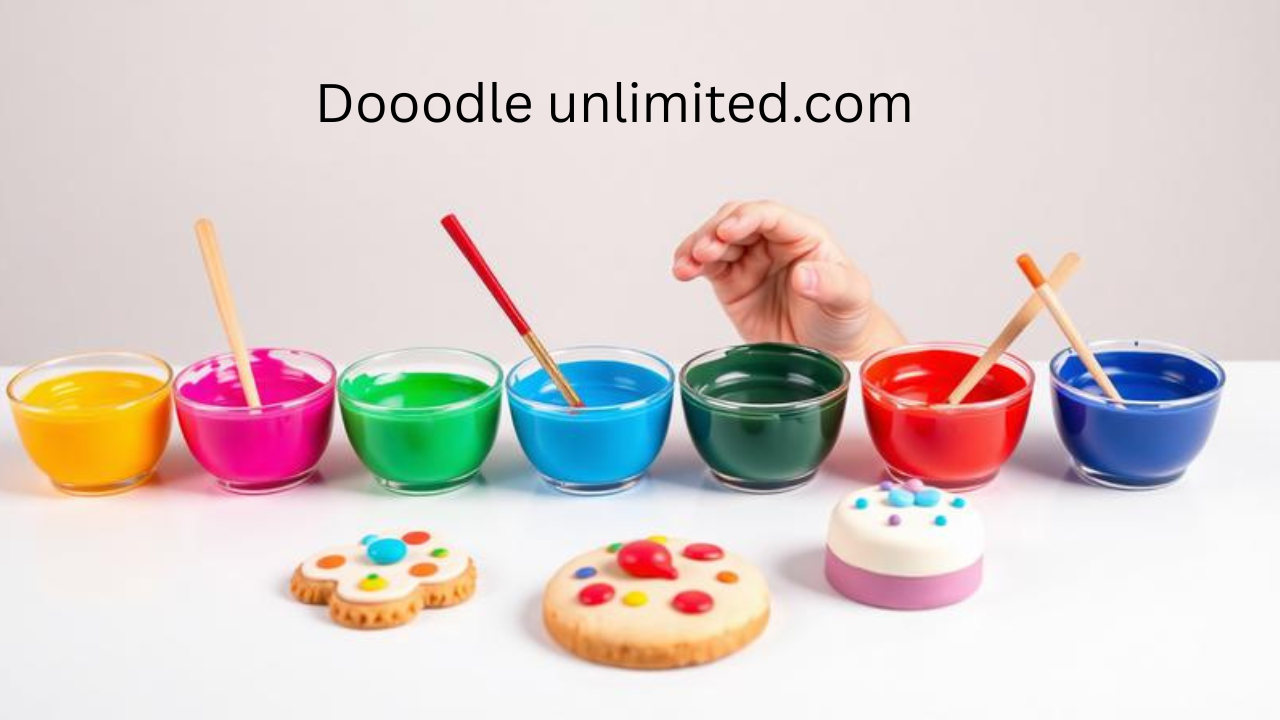
Edible paint transforms cake decorating from simple icing into true artistry. You can paint detailed designs on fondant, color cookies, or even create edible masterpieces on fruit. The paint dries to a beautiful finish and tastes great too.
4. Customizable Colors and Flavors
Commercial food coloring often comes in limited shades. With homemade edible paint, you can mix primary colors to create any hue imaginable—red + yellow = orange, red + blue = purple, yellow + blue = green, and red + yellow + blue = black. You can also add flavor extracts like vanilla, lemon, or peppermint to make the paint smell and taste amazing.
5. Cost-Effective
Most edible paint recipes use ingredients you already have in your pantry—flour, sugar, cornstarch, salt, and water. Compared to buying specialty edible paints or expensive non-toxic art supplies, homemade versions are incredibly budget-friendly.
6. Eco-Friendly
Commercial paints contribute to water pollution and environmental waste. Homemade edible paint uses natural, biodegradable ingredients that are safe for both your children and the planet.
Step-by-Step / 7 Edible Paint Recipes
Here are seven tried-and-tested recipes for homemade edible paint. Choose based on your needs—whether you’re painting with a baby, decorating a cake, or mixing cocktails.
Recipe 1: Classic Gel Paint (Cooked)
Best for: Finger painting with babies and toddlers
This velvety smooth gel paint is a favorite among parents and daycare teachers. It’s wonderfully gloopy, has amazing sensory texture, and is incredibly easy to clean up.
Ingredients:
-
2 tablespoons sugar
-
1/3 cup cornstarch
-
2 cups water
-
Food coloring (gel or liquid)
Equipment:
-
Medium saucepan
-
Wooden spoon
-
Small containers for each color
Instructions:
-
Combine ingredients: Mix the sugar, cornstarch, and water in a medium saucepan.
-
Cook the mixture: Heat over medium-high heat, stirring consistently and scraping the bottom of the pan to prevent sticking.
-
Watch for transformation: After a few minutes, the mixture will change from milky liquid to an almost translucent gel with a consistency similar to hair gel. This is your signal to remove it from heat! Don’t cook it much more, or it will become too hard to paint with.
-
Divide and color: Scoop the gel out of the pan and divide it evenly among your containers. Add food coloring to each and stir well.
-
Cool and create: Once cool enough to touch, your edible finger paint is ready for artistic exploration.
Storage: Keep in airtight containers in the refrigerator for up to one week.
Recipe 2: Yogurt Paint (No-Cook)
Best for: Quick, easy, baby-safe painting
With just two ingredients, this is the simplest edible paint recipe out there.
Ingredients:
-
Plain or vanilla yogurt
-
Food coloring (or natural fruit/vegetable purees)
Instructions:
-
Put yogurt in several small bowls or in different compartments of a muffin tin.
-
Add a couple drops of food coloring to each portion and mix.
-
Start painting with brushes or fingers!
Pro tip: If you’re concerned about artificial food colorings, look for brands that use vegetable-based pigments, such as Watkins, Chefmaster, or McCormick’s Color By Nature.
Recipe 3: Powdered Sugar Paint (No-Cook)
Best for: Cookie and cake decorating
This glossy paint is perfect for adding artistic details to baked goods.
Ingredients:
-
1 cup powdered sugar
-
2 tablespoons milk (or water for a vegan option)
-
1 tablespoon corn syrup
-
Food coloring (gel or liquid)
Instructions:
-
In a medium mixing bowl, combine the powdered sugar and milk (or water). Stir until smooth.
-
Add the corn syrup and mix well.
-
Divide the mixture into small containers.
-
Add a few drops of food coloring to each container, adjusting for desired vibrancy.
-
Mix thoroughly until you achieve your desired color.
-
Use paintbrushes to apply to cooled cookies, fruits, or plain cakes.
Storage: Store in an airtight container in the refrigerator for up to one week. Remix with a bit of milk or water before use.
Recipe 4: Corn Syrup Paint (Cooked)
Best for: Glossy, vibrant paintings
This recipe creates a glossy, vibrant paint that’s great for both kids’ art and food decoration.
Ingredients:
-
1 cup water
-
1/2 cup corn syrup
-
1/2 cup cornstarch
-
Food coloring (gel or liquid)
Instructions:
-
In a medium saucepan, combine the water, corn syrup, and cornstarch.
-
Stir over medium heat until thickened, about 5–10 minutes.
-
Remove from heat and let cool slightly.
-
Pour the mixture into small bowls for multiple colors.
-
Add drops of food coloring to each bowl and mix thoroughly.
Storage: Keep in airtight containers in the refrigerator for up to one week.
Recipe 5: Flour-Based Paint (Cooked)
Best for: When you don’t have cornstarch on hand
This recipe uses all-purpose flour as a base and is a great alternative to cornstarch-based paints.
Ingredients:
-
3 tablespoons sugar
-
1/2 teaspoon salt
-
1/2 teaspoon cornstarch (or skip and use more flour)
-
1 cup all-purpose flour
-
1 cup water
-
Food coloring
Instructions:
-
Mix all dry ingredients together (except food coloring).
-
Add water and stir thoroughly into a smooth batter, ensuring no lumps remain.
-
Pour into a saucepan and cook over low heat for about 15 seconds, stirring constantly.
-
Divide into containers and add food coloring to each.
Recipe 6: Condensed Milk Paint (No-Cook)
Best for: Sweet, glossy cake painting
This is one of the easiest edible paint recipes—and it tastes delicious.
Ingredients:
-
Canned condensed milk
-
Food coloring
Instructions:
-
Carefully open the can of condensed milk.
-
Pour the condensed milk into small bowls.
-
Add small amounts of food coloring to each bowl.
-
Stir with a small spoon, cocktail stick, or lollipop stick.
Recipe 7: Natural Vegetable/Fruit Paints
Best for: All-natural, dye-free coloring
If you want to avoid artificial food colorings entirely, you can make natural paints from fruits and vegetables.
Color Guide:
-
Red/Pink: Beetroot juice, strawberry puree, or red cabbage (with a touch of lemon)
-
Purple/Blue: Purple cabbage, blueberries, or grape juice
-
Yellow: Turmeric powder mixed with water, or yellow bell pepper juice
-
Green: Spinach juice or matcha powder
-
Orange: Carrot juice or paprika
-
Brown: Cocoa powder mixed with water
Basic Method (Vegetable/Fruit Extraction):
-
Wash and chop the fruit or vegetable.
-
Add to a small pot with a little water and simmer until soft (about 5 minutes).
-
Blend in a food processor until smooth.
-
Strain through a fine sieve or cheesecloth to extract the liquid.
-
Simmer the liquid over low heat to concentrate the color into a paste-like consistency.
-
Mix the natural colorant with a base (yogurt, corn syrup paint, or powdered sugar paint) to create your edible paint.
Bonus: Cocktail Edible Paint
For the adults, this boozy paint adds artistic flair to cocktail glasses.
Ingredients:
-
1/4 cup vodka
-
Equal amount corn syrup
-
Food coloring
Instructions:
-
Mix vodka and corn syrup together.
-
Add food coloring and adjust for desired intensity.
-
Use a brush to paint the inside of cocktail glasses or across the rim.
For alcohol-free versions: Substitute lemon juice for vodka.
Common Mistakes to Avoid
Even with simple recipes, things can go wrong. Here are the most common pitfalls and how to avoid them.
1. Overcooking the Gel Paint
The mistake: Leaving the cornstarch mixture on the heat too long.
Why it happens: The mixture transforms from milky liquid to gel quickly. If you keep cooking, it becomes a rubbery, unusable solid.
The fix: Watch closely. As soon as the mixture turns translucent and has a hair-gel consistency, remove it from heat immediately.
2. Not Stirring Constantly
The mistake: Walking away while the paint is cooking.
Why it happens: Cornstarch and flour mixtures burn easily and stick to the bottom of the pan.
The fix: Stir continuously. Consider it a meditation practice—just keep stirring!
3. Using the Wrong Food Coloring
The mistake: Using liquid watercolors or craft dyes instead of food-grade coloring.
Why it happens: They look similar, but they’re not the same. Liquid watercolors are not food-safe.
The fix: Always use food coloring labeled for culinary use. Gel food coloring gives more vibrant results than liquid.
4. Making the Paint Too Thick or Too Thin
The mistake: Adding too much or too little liquid.
Why it happens: Recipes provide guidelines, but humidity and ingredient brands vary.
The fix: Start with less liquid and add gradually. If the paint is too thick, add a few drops of water or milk and stir. If too thin, add more powdered sugar or cornstarch.
5. Not Testing Colors Before Painting
The mistake: Assuming the wet color will look the same when dry.
Why it happens: Many edible paints, especially natural ones, fade as they dry.
The fix: Test a small amount on a scrap piece of paper or surface before starting your project. Use more coloring than you think you need for vibrant results.
6. Using Expired Ingredients
The mistake: Not checking the expiration dates on cornstarch, flour, or food coloring.
Why it happens: Pantry items can sit for a long time.
The fix: Always check食用限期 (expiration dates) before making edible paint.
7. Storing Improperly
The mistake: Leaving paint out at room temperature or in direct sunlight.
Why it happens: It’s easy to forget about leftovers.
The fix: Store in airtight containers in the refrigerator. Most edible paints last 1–2 weeks when properly stored. Natural colorings may fade faster if exposed to light.
8. Forgetting to Let Paint Cool
The mistake: Giving hot paint to children.
Why it happens: Impatience!
The fix: Always let cooked paint cool completely before handing it to little ones.
FAQs
1. Is edible paint really safe to eat?
Yes—when made correctly with food-grade ingredients. However, “edible” doesn’t mean “should be eaten as a meal.” The ingredients are safe if accidentally swallowed, but the paint is intended for artistic use, not as food. Always supervise young children during painting activities.
2. How long does homemade edible paint last?
Storage times vary by recipe:
-
Gel paint (cornstarch-based): Up to 1 week in the refrigerator
-
Powdered sugar paint: Up to 1 week in the refrigerator
-
Yogurt paint: 2–3 days (dairy products spoil faster)
-
Flour-based paint: 3–5 days in the refrigerator
Always store in airtight containers and check for signs of spoilage (smell, mold, texture changes) before use.
3. Can I make edible paint without food coloring?
Absolutely! Use natural colorants from fruits, vegetables, and spices:
-
Beet juice → pink/red
-
Turmeric → yellow
-
Spinach juice → green
-
Blueberries → blue/purple
-
Cocoa powder → brown
-
Paprika → orange
4. What surfaces can I use edible paint on?
Edible paint works on:
-
Paper (for kids’ art projects)
-
Cardboard
-
Fondant and icing (cake decorating)
-
Cookies and biscuits
-
Fresh fruit
-
Cocktail glasses (for decorative purposes)
Note that edible paint may not adhere well to glossy or non-porous surfaces.
5. Why did my edible paint turn out grainy or lumpy?
This usually happens when dry ingredients aren’t mixed thoroughly before cooking, or when the mixture isn’t stirred constantly. To fix:
-
Sift dry ingredients before mixing
-
Whisk vigorously to break up lumps
-
For cooked paints, stir constantly to prevent clumping
6. Can I freeze edible paint?
Freezing is not recommended for most edible paints. The texture changes upon thawing, becoming watery or separating. It’s better to make smaller batches and store in the refrigerator.
7. Is edible paint suitable for children with allergies?
It depends on the recipe. For children with allergies:
-
Use water instead of milk for dairy-free options
-
Choose gluten-free flours if needed
-
Avoid nuts or other allergens in your ingredients
-
Always check labels on food coloring for potential allergens
Conclusion
Making your own edible paint is one of those rare projects that delivers on every level: it’s safe, fun, creative, and surprisingly simple. Whether you’re a parent looking for worry-free art activities for your little ones, a baker wanting to elevate your cake decorating game, or just someone who loves colorful crafts, these seven recipes give you everything you need to get started.
Remember: the best part about edible paint isn’t just that it’s safe to eat—it’s the freedom it gives you to create without fear. No more panicking when paint goes in the mouth. No more worrying about toxic ingredients. Just pure, colorful, joyful creativity.
So grab your apron, raid your pantry, and start painting. Your next masterpiece—edible or not—is waiting.
Want more creative DIY ideas? Check out our guide on [natural food coloring from fruits and vegetables] or subscribe to our newsletter for weekly craft and recipe inspiration delivered straight to your inbox.