 By Richard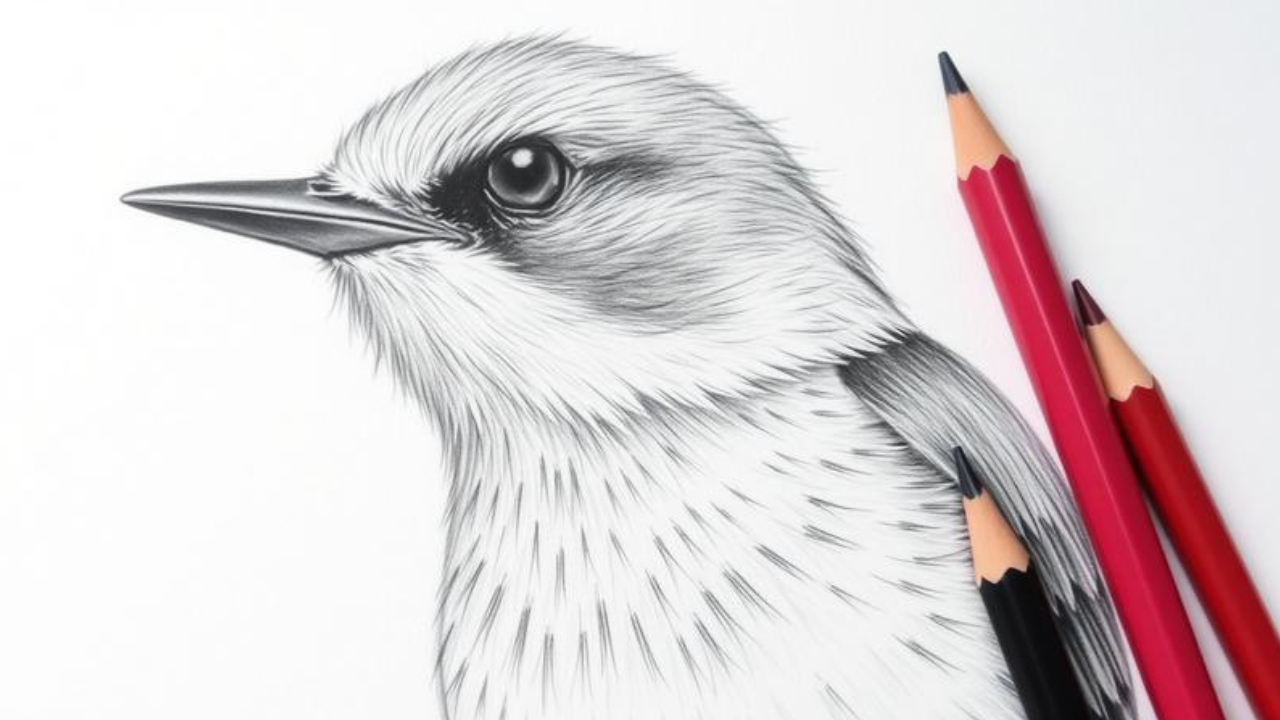
Have you ever stared at a blank page, pencil in hand, and felt utterly stuck trying to translate the lively northern mockingbird into a sketch? You are not alone. A mockingbird drawing pencil attempt often derails when you skip straight to fine feathers without first locking in the bird’s core structure. This guide fixes that. You will learn a complete mockingbird drawing pencil easy method—from first outline to final shaded form—using only graphite. By the end, you’ll produce a recognizable, three-dimensional songbird you can proudly share. Grab your pencils; let’s bring that mockingbird to life.
Table of Contents
-
What Is a Mockingbird Drawing Pencil?
-
Why Does a Mockingbird Drawing Pencil Sketch Matter?
-
Northern Mockingbird: Key Facts for Pencil Artists
-
How to Create a Mockingbird Drawing Pencil Easy Step-by-Step
-
Common Mistakes to Avoid in Mockingbird Pencil Drawings
-
Expert Tips for a Realistic Mockingbird Drawing Pencil Sketch
-
Frequently Asked Questions
-
Conclusion
What Is a Mockingbird Drawing Pencil?
A mockingbird drawing pencil is a grayscale sketch of the Northern Mockingbird created entirely with graphite pencils. You focus solely on shape, tone, and texture instead of color. Think of it as sculpting with light and shadow. If you have ever shaded a simple sphere to make it look round, you already understand the core idea. You apply the same principle to the bird’s head, body, wing, and long tail.
For example, rather than drawing individual feathers immediately, you first block in a mid-gray value across the wing. Then you darken the shadow areas and lift out highlights with an eraser. This approach builds form quickly and reduces overwhelm. A mockingbird drawing easy approach with pencil is forgiving—you can erase, blend, and layer graphite until the bird emerges naturally. You don’t need expensive supplies; a simple set of graphite pencils and paper gives you everything required. By stripping away the distraction of color, you train your eye to see what truly makes a drawing realistic: proportion, value, and edge control.
Why Does a Mockingbird Drawing Pencil Sketch Matter?
Learning a mockingbird drawing pencil sketch does more than fill a page—it sharpens core artistic skills you will use forever.
-
You learn to see value, not just outlines. Training your eye to spot light and dark patches transforms flat shapes into lifelike volumes.
-
It builds shading confidence fast. With graphite, mistakes erase easily. You can experiment without fear, which speeds up improvement.
-
You master proportion through a real subject. A mockingbird’s specific tail-to-body ratio forces you to measure with your eyes, a critical drawing habit.
-
Pencil work improves hand control. Delicate pressure changes develop the fine motor skills needed for detailed work later.
-
It creates a strong foundation for any bird sketch. Once you draw a mockingbird with graphite, robins, finches, and sparrows all feel approachable.
-
Finishing a monochrome piece feels rewarding. According to a 2020 study in the Journal of Applied Cognitive Psychology, drawing an object boosts memory recognition by nearly 50% compared to merely writing about it.
A successful mockingbird drawing pencil realistic approach starts here, with the fundamentals that elevate every future artwork.
Northern Mockingbird: Key Facts for Pencil Artists
Knowing a few anatomical markers prevents your bird from becoming a generic blob. The northern mockingbird has distinct traits you can capture with your pencils.
Proportions You Must Get Right
A mockingbird’s body appears slim and elongated. Its tail equals the body length from beak base to tail base. The head is rounded, roughly one-quarter the body size. The legs are slim with a slight backward bend at the ankle. When perched, the bird holds its tail slightly downward. Memorize these relationships before you sketch.
Signature Features for a Realistic Outline
The mockingbird drawing outline depends on three non-negotiable details. First, a dark eye stripe runs from the beak base through the eye like a mask. Second, the folded wing shows a distinct white wing bar—leave this area light or erase it back later. Third, the breast is pale with faint streaks, while the upperparts are soft gray. Capturing these three elements guarantees your sketch reads as a mockingbird, not an anonymous songbird.
Pencil Grades and Their Jobs
Different graphite pencils serve specific roles. Sticking to one pencil creates a flat, muddy result. Use this table as your quick reference.
| Pencil Grade | Best Use in Mockingbird Drawing | Pressure Level |
|---|---|---|
| 2H | Initial light outline, faint body shape | Very light |
| HB | Refining contours, mid-tone under-sketch | Light to medium |
| 2B | Soft body shading, wing volume | Medium |
| 4B | Dark eye stripe, tail depth, shadow areas | Medium to heavy |
| 6B | Deepest accents: eye pupil, perch shadow | Heavy, controlled |
For a mockingbird drawing pencil for kids, you can simplify to just an HB and a 4B to keep it manageable while still teaching value range.
How to Create a Mockingbird Drawing Pencil Easy Step-by-Step
Work through these seven steps with patience. You will use the mockingbird drawing pencil technique to move from basic structure to a polished, shaded sketch.
1. Gather your tools and a reference photo.
You need a set of graphite pencils (2H to 4B at minimum), good drawing paper, a kneaded eraser, and a sharpener. Pull up a clear side-view image of a northern mockingbird from. Keep the photo visible throughout.
2. Lightly sketch the basic framework.
With a 2H pencil, draw a slanted oval for the body and a small circle overlapping its top-front for the head. From the lower back of the body, extend a long, narrow triangle for the tail—make it as long as the body. Add a tiny triangle for the beak. Use feather-light pressure; these lines will disappear.
3. Refine the outline and add key facial details.
Switch to an HB pencil. Trace over your framework, smoothing the connection between head and body. Place a small circle for the eye, then draw the dark eye stripe from the beak base through the eye. Sketch the legs with a slight backward bend and tiny toes gripping a horizontal line you add as a branch.
4. Define the wing and tail feathers lightly.
Draw a curved line from mid-body down toward the tail to mark the wing edge. Inside this shape, suggest a few long feather groups. Don’t draw every strand—suggest texture with a few parallel, slightly curved strokes. Outline the tail feathers with similar restraint.
5. Apply your first layer of shading.
Grab a 2B pencil and hold it at a shallow angle. Shade the entire upper body, wing, and top of the tail with an even, light-gray tone. Leave the breast and the white wing bar untouched. This instantly separates the dark and light areas and gives the bird volume.
6. Deepen shadows and create contrast.
Switch to a 4B pencil. Darken the eye stripe, the eye pupil (leave a tiny white catchlight), the underside of the tail, and the shadow where the wing meets the body. Add a soft shadow under the bird on the branch. Layering gradually builds richness without over-darkening.
7. Lift highlights and finalize details.
Use your kneaded eraser to gently lift graphite from the white wing bar and the belly, cleaning up any smudges. Sharpen the beak outline and the toes. Step back and check proportions. Your mockingbird drawing pencil easy project is now a finished, realistic sketch you can be proud of.
Common Mistakes to Avoid in Mockingbird Pencil Drawings
Avoid these errors and your mockingbird drawing pencil realistic attempt will succeed much faster.
Mistake: Drawing a tail that’s too short.
A short tail destroys the mockingbird silhouette. Always verify that the tail length from base to tip matches the body length. If in doubt, draw it longer and erase back.
Mistake: Pressing too hard with dark pencils too early.
Many beginners grab a 4B and outline everything heavily. This makes corrections impossible and flattens the form. Build value slowly, starting with 2H and progressing to darker grades.
Mistake: Ignoring the light source.
Without a consistent light direction, shading becomes random. Decide where light hits (for example, from the upper left) and keep shadows on the opposite side. This single choice unifies your sketch.
Mistake: Forgetting the white wing bar.
A uniformly shaded wing looks like a generic bird. Always preserve a clean, unshaded strip across the folded wing. Erase it back if needed—it’s the mockingbird’s most visible field mark.
Mistake: Smudging graphite carelessly across the paper.
Resting your hand on the drawing smears shading into the white breast. Place a clean sheet of scrap paper under your drawing hand to protect your work.
Expert Tips for a Realistic Mockingbird Drawing Pencil Sketch
Apply these five tips and your mockingbird drawing pencil will look far more polished.
-
Use a slip sheet. Always rest your hand on a clean piece of paper to prevent accidental smudges on the bird’s pale breast.
-
Sharpen your pencil frequently for details. A dull point makes the eye stripe and beak look messy; a needle-sharp point adds crispness instantly.
-
Blend with a tortillon, not your finger. A paper stump moves graphite smoothly without adding skin oils that can stain the paper.
-
Erase with a kneaded eraser molded to a fine tip. You can “draw” highlights by lifting graphite precisely, perfect for the wing bar and catchlight.
-
Practice the eye stripe separately. On scrap paper, sketch five quick eyes with the stripe. That thirty-second drill locks in the northern mockingbird’s face.
Frequently Asked Questions
How can I do a mockingbird drawing pencil for kids that still looks good?
Simplify to two pencil grades: HB for outlines and 2B for light shading. Focus on the long tail, round body, and dark eye stripe. Skip heavy shading and let kids enjoy a mockingbird drawing outline they can color later. A recognizable shape matters more than realism at this stage. Keep the session under 20 minutes.
What is the best way to draw a realistic mockingbird drawing pencil step by step?
Start with a very light 2H framework, nail the proportion (especially the long tail), then layer shading from HB up to 4B gradually. Preserve the white wing bar and keep the belly bright. Reference a high-quality photo of a northern mockingbird throughout. Patience with the shading process creates the realism you want.
How do I create a clean mockingbird drawing outline without smudges?
Use a harder pencil like 2H with feather-light pressure. Sketch the basic shapes, refine them lightly with HB, then erase construction lines with a clean kneaded eraser. Once satisfied, spray with a workable fixative or lay a slip sheet under your hand. Darken only the final outlines after the shading stage to keep edges crisp.
Conclusion
You now own every tool needed for a successful mockingbird drawing pencil sketch. Remember to lock in the long tail and dark eye stripe first, build shading from light to dark using multiple pencil grades, and always protect that white wing bar. These three habits alone will transform your bird drawings. Pick up a pencil, open a reference photo, and sketch your framework today. In under half an hour, a northern mockingbird will gaze back at you from the page. Which bird will your pencil capture next? Tell us in the comments.