
Introduction
Have you ever watched a video of an elaborate chain reaction—marbles rolling down ramps, dominoes toppling in sequence, and a simple task being accomplished in the most ridiculously complicated way possible—and thought, “I want to build one of those”? You’re not alone. The problem is that most people don’t know where to start. They gather random items from around the house, start building without a plan, and end up with a contraption that falls apart halfway through.
This article delivers everything you need to know about Rube Goldberg supplies—the specific materials, tools, and components that make these magnificent machines actually work. Whether you’re a student tackling a school project, a parent looking for a creative STEM activity, or an adult builder chasing the satisfaction of a perfect chain reaction, you’ll learn exactly what to buy, where to find it, and how to use it. By the end, you’ll have a complete shopping list and the knowledge to build a machine that runs smoothly from start to finish.
What Is a Rube Goldberg Machine?
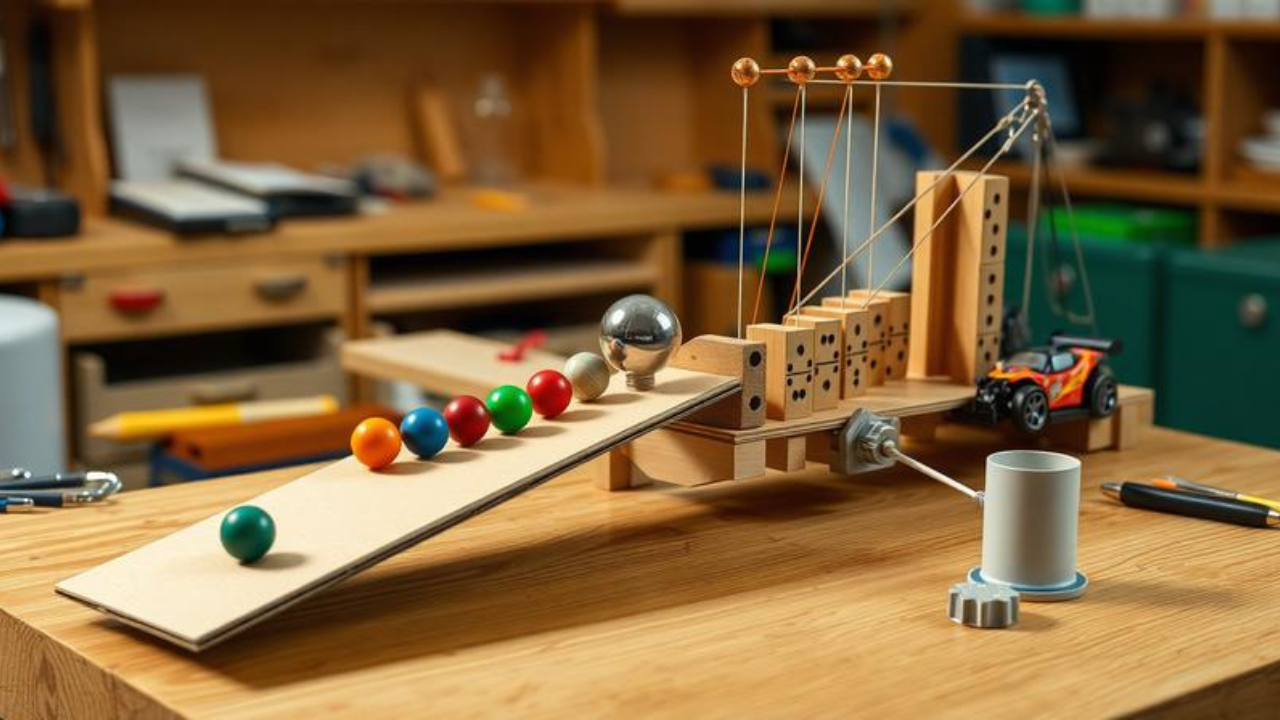
A Rube Goldberg machine is a complex contraption that uses a chain reaction of simple machines to accomplish a simple task in an overly complicated and humorous way. The concept originated with Rube Goldberg, a cartoonist who drew whimsical illustrations of elaborate machines performing everyday tasks. His first machine illustration, the “Automatic Weight Reducing Machine,” appeared in 1914 and featured components like a donut, bomb, wax, balloon, and hot stove.
Today, Rube Goldberg machines have become a beloved part of pop culture, STEM education, and creative engineering. They appear in music videos, commercials, science museums, and classroom projects worldwide. The core principle is simple: one action triggers the next in a chain reaction, ultimately completing a straightforward task like flipping a light switch, cracking an egg, or closing a book.
Why Rube Goldberg Machines Matter
Building a Rube Goldberg machine is far more than just a fun pastime. It’s a hands-on way to learn about physics, engineering, and problem-solving. Every step in a chain reaction involves energy transfer—potential energy becomes kinetic energy, which becomes impact force, which triggers the next movement. Builders must understand concepts like gravity, friction, momentum, and leverage.
The benefits extend beyond academics. Rube Goldberg projects develop:
-
Critical thinking and troubleshooting skills—when a step fails, you have to diagnose why and fix it
-
Patience and persistence—machines rarely work on the first try
-
Creativity—there’s no single “right” way to build one; imagination is the only limit
-
Systems thinking—understanding how individual components work together as a whole
For educators, Rube Goldberg machines are a powerful STEM tool that engages students in active learning. For families, they’re a bonding activity that turns household recycling into engineering challenges.
The Ultimate Rube Goldberg Supplies List
Choosing the right materials is the single most important factor in building a successful machine. Most machines fail not because of a bad design, but because of the wrong materials. Every step in your chain reaction needs the right material to do the right job.
Rolling and Moving Materials
These are the workhorses of any Rube Goldberg machine. They carry energy from one point to another.
Balls:
-
Marbles—small, heavy, and predictable; ideal for tight spaces
-
Ping pong / table-tennis balls—lightweight and bouncy; good for gentle triggers
-
Golf balls—heavier and slower; great for knocking down larger objects
-
Tennis balls—large and soft; useful for bigger machines
Vehicles and rolling objects:
-
Toy cars—consistent motion on flat surfaces
-
Small building blocks—can be stacked and knocked over
-
Dominoes—the classic chain reaction starter
Simple Machine Components
Every Rube Goldberg machine is built from the six simple machines. Here are the supplies you need for each:
Inclined Planes (Ramps):
-
Cardboard strips and tubes
-
Wooden blocks and door stops
-
Toy slides and hardcover books
-
Paper towel rolls
Wheels and Axles:
-
Cardboard tubes
-
Plastic lids and cups
-
Playdough (for making custom wheels)
-
Wooden dowels and toothpicks (as axles)
Levers:
-
Binder clips with craft sticks
-
Pencils and rulers
-
Wooden or metal rulers
Pulleys:
-
String with rolls of tape or spools
-
Carabiners
-
Nylon cord (more reliable than standard string)
Screws and Wedges:
-
These are less common in basic builds but can be incorporated with hardware store parts
Triggering and Transfer Components
These parts connect one step to the next:
-
Dominoes—predictable tipping chain
-
Stacked blocks—fall to trigger the next action
-
Aligned cans—roll or tip into the next step
-
Small baskets and funnels—direct falling objects
-
Rubber bands—store and release energy
-
Pulleys and string—transfer motion across distances
Structural Supplies
Your machine needs to stay in place while all the action happens:
-
Tape—duct tape, masking tape, and electrical tape are essential
-
Glue—hot glue is particularly effective for securing components
-
Scissors—for cutting cardboard, string, and tape
-
Rulers—for measuring and as makeshift ramps
-
Heavy books—as stabilizers and weights
-
Blocks, boxes, and Legos—for supporting ramps at the right height
Recycled and Household Items
One of the beauties of Rube Goldberg machines is that you can build them from everyday objects:
-
Egg cartons
-
Yogurt containers
-
Tissue boxes
-
Bottle caps
-
Cereal boxes
-
Paper towel and toilet paper tubes
-
Plastic cups
-
Popsicle sticks
-
Chopsticks
Advanced and Specialty Components
For more complex machines, consider adding:
-
Small fans—create airflow to move lightweight objects
-
Magnets—attract or repel components
-
Springs—store and release energy
-
Gears—transfer rotational motion
-
PVC pipe—for custom ramps and tracks
-
Wire and alligator clips—for electrical triggers
Where to Buy Rube Goldberg Supplies
Online Retailers
Amazon is the most comprehensive source for Rube Goldberg supplies. You can find everything from marble runs and domino sets to specialty kits and individual components. Search for “Rube Goldberg machine kit,” “marble run,” “chain reaction kit,” or individual components like pulleys, dominoes, and ramps.
Specialty STEM and educational retailers offer curated kits:
-
Ubuy carries a range of Rube Goldberg products and complete kits
-
Klutz LEGO Chain Reactions Kit includes 33 custom LEGO elements plus an instruction book
-
the motionKit offers wooden pieces that nudge, roll, spin, and tilt to transform household objects into chain reactions
Hardware stores are excellent sources for structural materials:
-
PVC pipe and fittings for ramps and tracks
-
Rope, cord, and wire for pulleys and triggers
-
Corner braces and brackets for supports
-
Duct tape, zip ties, and adhesives
Craft stores provide:
-
Popsicle sticks, wooden dowels, and craft sticks
-
String, yarn, and elastic bands
-
Cardboard, foam board, and poster board
-
Glue, tape, and cutting tools
Recycling and thrift stores are treasure troves of cheap or free materials—bottles, containers, toys, and random objects that can become machine components.
Pre-Made Kits vs. DIY Supplies
Pre-made kits offer convenience and guaranteed compatibility. They include everything you need and often come with instructions. The Rowood 294-piece 3D wooden puzzle marble run is inspired by Rube Goldberg machines and features slides, twists, and tricky devices. The Chaos Tower includes 602 pieces and stands up to 78 inches tall.
DIY supplies offer more creativity and are generally cheaper. You’re limited only by your imagination and what you can find. Most successful Rube Goldberg builders use a mix of both approaches—kits for precision components and household items for the rest.
Step-by-Step Guide to Building Your Machine
Step 1: Define Your Final Action
Start by deciding what your machine will actually do at the end. Pick one simple, testable action: ring a bell, flip a switch, drop an object, or crack an egg. Everything else in your build exists to make that one thing happen.
Good end triggers are forgiving—they don’t require perfect precision or high force after many energy transfers.
Step 2: Map Your Chain Reaction
Before picking up a single object, map out your full chain on paper. Write it as a straight cause-and-effect sequence. Each step should answer one question: what does this trigger next?
Keep your step count between 5 and 8. That range gives you enough complexity without creating too many failure points. More steps don’t mean a better machine; they mean more things that can go wrong.
Step 3: Gather Your Supplies
Based on your design, gather the specific materials you’ll need. Choose materials that behave the same way every single time:
-
Balls for consistent roll and impact
-
Dominoes for predictable tipping
-
Rigid surfaces for stable energy paths
-
Solid supports that won’t wobble
Avoid soft or flexible objects that absorb energy instead of passing it on.
Step 4: Build and Test Each Step Individually
Don’t build the whole machine and then test it. Build one step. Test it. Make sure it works on its own. Then move to the next.
For each step, understand the basic motion type: rolling into an impact, impact causing a tip, tipping pulling something, pulling triggering the next action. Find the minimum force needed for each step to trigger the next.
Step 5: Connect Sections
Break your machine into sections of 2–4 steps each:
-
Build a section
-
Test it multiple times
-
Lock it in once it’s reliable
-
Connect it to the next section
This way, you’re only ever troubleshooting a small part at a time.
Step 6: Test, Refine, and Repeat
You’ll need to keep testing, reworking, and improving until you’re happy with your new contraption. Small inconsistencies that seem minor when steps are isolated will compound when the full sequence runs.
Step 7: Add Details
Once the basic machine is working, add decorations, signs, and other embellishments to make it visually appealing.
Tips for Success
Start from the End
Build your machine backward. Once your end trigger is locked in, design the entire machine to build toward it. This helps you match force levels and avoid dead ends.
Control Movement Paths
Even a well-designed trigger can fail if the object doesn’t travel in the right direction. Use:
-
Rails or walls on either side of a path
-
Tape to mark and confine a rolling direction
-
Barriers to prevent objects from falling off tables
Match Force Between Steps
A heavy ball rolling into a lightweight stick will knock it too far or break the sequence. Always match energy levels between connected steps. Strong actions should lead to strong next steps. Light actions should connect to light next steps.
Avoid Precision-Only Steps
If a step only works when something lands in a very specific spot, it will fail more than it succeeds. Replace narrow targets with wider, more forgiving trigger zones.
Use Direct Contact
The more variables involved in a trigger, the more ways it can fail. A domino hitting a ball directly is more reliable than a string pulling a lever that tips a cup.
Common Mistakes to Avoid
Using the Wrong Materials
Mistake: Grabbing whatever’s nearby without considering how it will behave.
Solution: Choose materials that behave predictably. Soft or flexible objects absorb energy instead of passing it on. Uneven surfaces create random, unpredictable motion.
Mismatched Force
Mistake: Using a lightweight object to trigger something much heavier.
Solution: Always check that your trigger object can actually move whatever comes next. Too much force destroys alignment; too little fails to trigger.
Skipping Individual Testing
Mistake: Building the whole machine and then testing it.
Solution: Build and test each step individually before connecting them. This prevents compounded failures that are impossible to trace.
Off-Center Collisions and Spacing Errors
Mistake: Not paying attention to alignment and spacing between steps.
Solution: Reposition objects and make sure your base surface is stable and flat. Even a slight misalignment can derail the entire chain.
Using String That Stretches
Mistake: Using standard string that stretches and frays easily.
Solution: Use nylon cord instead. It’s more reliable and consistent.
Unstable Supports
Mistake: Using flexible materials like thin cardboard as supports.
Solution: Use solid, stable supports that won’t bend under weight or shift during the run.
Hair Triggers
Mistake: Building triggers that are too sensitive or erratic.
Solution: Avoid triggers that depend on perfect alignment or require precision. They’re easy to build but too unpredictable in use, especially as things wear out through repeated use.
Underestimating Force Loss
Mistake: Assuming that energy will transfer perfectly through every step.
Solution: Nothing generates as much force as you think it will. Overbuild your triggers and test for minimum force requirements.
Frequently Asked Questions
1. What are the most essential Rube Goldberg supplies for a beginner?
For a first-time builder, start with marbles, dominoes, cardboard tubes, tape, string, toy cars, and some blocks or cups. These materials are cheap, readily available, and behave predictably. You can build a solid 5-8 step machine with just these items.
2. Can I build a Rube Goldberg machine with only household items?
Absolutely. Recyclables like egg cartons, yogurt containers, tissue boxes, and bottle caps work great. The most creative machines are often built entirely from everyday objects. The key is choosing items that behave consistently, not just whatever’s closest.
3. Where can I buy Rube Goldberg machine kits?
Online retailers like Amazon and Ubuy carry a range of kits. The Klutz LEGO Chain Reactions kit is excellent for kids. The Rowood marble run kit offers 294 pieces for more complex builds. Specialty STEM retailers also offer curated kits with all necessary components.
4. How many steps should my Rube Goldberg machine have?
For a school project or first build, aim for 5–8 steps. This gives you enough complexity to be impressive without creating too many failure points. More steps don’t mean a better machine—they mean more things that can go wrong.
5. Why does my Rube Goldberg machine keep failing?
The most common causes are: mismatched force between steps (too light or too heavy), off-center collisions or spacing errors, unstable surfaces, and skipping individual step testing. Build and test each step independently before connecting them, and make sure your base is stable and flat.
Conclusion
Building a Rube Goldberg machine is one of the most creative, challenging, and rewarding projects you can take on. The right supplies make all the difference between a machine that runs perfectly and one that falls apart mid-chain. Start with predictable materials—marbles, dominoes, ramps, and tape—and build outward from there. Test each step individually, match force between stages, and never underestimate the importance of stable supports.
Remember, the journey is as important as the destination. Every failed run teaches you something about physics, engineering, and problem-solving. The satisfaction of watching your machine run perfectly from start to finish is worth all the troubleshooting along the way.
Ready to start building? Gather your supplies, sketch out your design, and begin with that first step. And if you’re looking for more inspiration, check out our guide on creative chain reaction ideas to spark your next masterpiece.