
 By Richard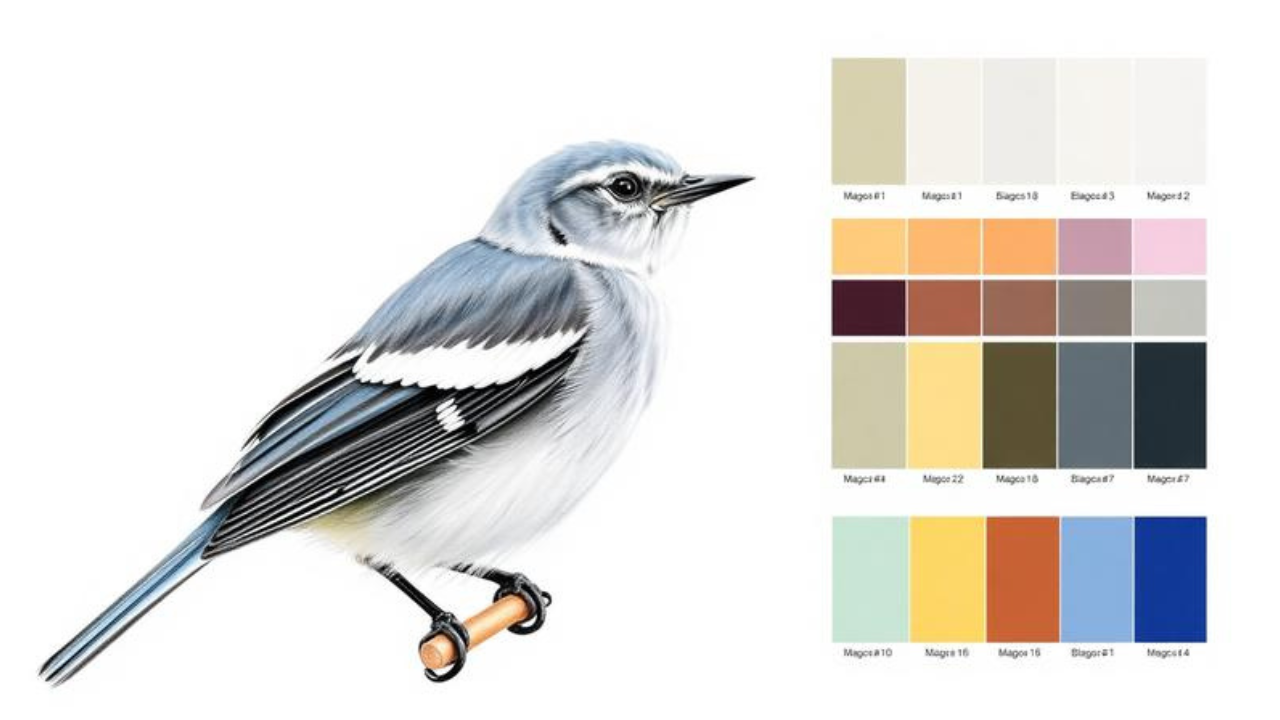
Did you know a northern mockingbird’s subtle grays and crisp white markings make it one of the most satisfying birds to bring to life with colored pencils? A mockingbird drawing color project transforms a flat outline into a vibrant portrait, and you can do it even with basic supplies. In this guide, you’ll learn a mockingbird drawing color easy approach using colored pencils. You’ll discover which colors to choose, how to layer them for a realistic feather look, and a step-by-step coloring sequence that works for kids and adults alike. By the end, you’ll have a beautifully colored mockingbird and the confidence to tackle any bird sketch.
Table of Contents
-
What Is Mockingbird Drawing Color?
-
Why Does Mockingbird Drawing Color Matter?
-
Mockingbird Drawing Color — Key Facts, Colors & Tools
-
How to Color a Mockingbird Drawing Step by Step
-
Common Mistakes to Avoid in Mockingbird Color Drawings
-
Expert Tips for Vibrant Mockingbird Color Art
-
Frequently Asked Questions
-
Conclusion
What Is Mockingbird Drawing Color?
Mockingbird drawing color is the process of adding realistic or creative color to a mockingbird line drawing. You take a finished mockingbird drawing outline and fill it with layers of pencil, crayon, marker, or paint to capture the bird’s soft gray back, white belly, dark eye stripe, and white wing patches. Think of it like building a layer cake. Your first layer provides the base gray. The next layer deepens the shadows. The final layer adds crisp highlights, just like frosting details. Even a mockingbird drawing color simple approach with a few gray pencils can produce a lifelike result.
For example, many beginners start with a printed coloring page and just four pencils—light gray, dark gray, white, and black. By layering these carefully, the flat sketch suddenly looks round, soft, and ready to chirp. The goal isn’t perfection; it’s watching your bird come alive through color. This technique works equally well for a mockingbird drawing color for kids project where bright, playful hues replace realism with joy.
Why Does Mockingbird Drawing Color Matter?
Learning to color a mockingbird unlocks skills that go far beyond one sketch. The benefits touch observation, technique, and well‑being.
-
You train your eye for subtle color shifts. A mockingbird isn’t just gray—it has cool blue‑gray undertones, warm brownish shadows, and stark white accents. Mixing these builds your color matching ability.
-
Layering technique becomes second nature. Applying color lightly, then building intensity, teaches a core skill for all colored pencil and painting work.
-
It’s a proven stress‑reliever. Focusing on calm, repetitive strokes quiets a busy mind. A 2020 study in the Journal of Art Therapy found structured coloring reduced anxiety levels by up to 30%.
-
You create a finished artwork faster. Adding color to a pre‑drawn outline feels less intimidating than starting from scratch. A completed mockingbird drawing color easy project gives an instant sense of achievement.
-
It bridges birdwatching and art. By carefully matching the northern mockingbird’s true plumage, you internalize field marks and remember the species forever.
-
Kids build fine motor control and patience. A mockingbird drawing color for kids activity strengthens the same hand muscles used for handwriting, all while having fun.
Mockingbird Drawing Color — Key Facts, Colors & Tools
Before you pick up a pencil, gather the right supplies and understand the bird’s real palette. This section gives you a quick color cheat sheet.
The Northern Mockingbird’s True Colors
The bird’s back and crown are a medium‑cool gray. The breast and belly are pale gray to white with faint, soft streaks. A dark charcoal stripe runs from the beak through the eye. The folded wing shows a prominent white patch (the wing bar), and the outer tail feathers flash white in flight. The beak and legs are dark gray‑black. Using reference mockingbird images keeps your colors accurate.
Essential Coloring Tools for a Simple Start
For a mockingbird drawing color pencil approach, you don’t need an expensive set. A basic beginner kit includes a light warm gray, a medium cool gray, a dark charcoal, white, and black. You can also use crayons or markers for a mockingbird drawing color simple version.
How Color Layering Works
Colored pencil coloring works best when you layer lightly and gradually. Pressing hard immediately creates a waxy, flat finish. Start with the lightest gray over the entire back. Add medium gray shadows. Finish with dark charcoal details. Use a white pencil to blend transitions and create soft highlights. This layering turns a flat shape into a rounded bird with feathery depth.
Quick Tool Comparison
| Coloring Tool | Best For | Beginner Tip |
|---|---|---|
| Colored pencils (wax‑based) | Layering, blending, realistic textures | Keep points sharp for crisp edges. |
| Crayons | Kids’ projects, bold coverage | Use the side for broad areas. |
| Markers (water‑based) | Flat, graphic style; quick fills | Choose brush tips for feather strokes. |
| Watercolor pencils | Soft wash effects, mixed media | Activate with a damp brush after coloring. |
How to Color a Mockingbird Drawing Step by Step
Follow this mockingbird drawing color step by step sequence. Work on a clean outline first. You can find a free printable or draw your own light sketch.
1. Gather your materials and reference.
Collect light gray, medium gray, dark gray/charcoal, white, and black colored pencils, plus a sharpener. Place a printed mockingbird image beside your paper for color matching. A blending stump or colorless blender pencil helps smooth transitions.
2. Apply the base gray layer on the back and head.
Using the lightest gray, gently shade the entire top of the head, the back, and the upper wing. Use light, even strokes in the direction the feathers grow. Leave the eye stripe, belly, and wing bar completely blank. This base layer immediately establishes the bird’s light‑dark separation.
3. Build medium gray shadows for depth.
Switch to a medium cool gray. Add soft shadow along the lower edge of the wing, beneath the head, and on the tail. Press just a bit harder than before. Keep the breast mostly untouched except for a very faint shadow right under the wing to suggest roundness.
4. Define the dark markings.
Pick up your dark gray or charcoal pencil. Sharply fill in the eye stripe from the beak through the eye, the pupil (leaving a tiny white catchlight), the beak, and the legs. Outline the tail feathers with dark strokes, leaving the outer edges lighter where white appears. This step makes your mockingbird drawing color instantly recognizable.
5. Add the white wing bar and belly highlights.
Use a white pencil to brighten the wing patch. Layer white gently over the entire belly, then press a little harder along the breast curve to create a soft highlight. The white pencil also blends the transition between the gray back and pale breast, eliminating harsh lines.
6. Blend, refine, and finalize.
Go over the entire bird lightly with the light gray or a colorless blender to unify the texture. Sharpen the dark eye and beak edges. Add a soft branch shadow underneath with dark gray. If you want a simple background, a pale blue sky or green foliage makes the mockingbird pop.
Common Mistakes to Avoid in Mockingbird Color Drawings
Mistake: Using only one gray pencil.
A single gray flattens the bird. Realism requires at least three values: light, medium, and dark. Layering those creates the rounded form that defines a successful mockingbird drawing color pencil project.
Mistake: Coloring the entire belly gray.
Many beginners fill the whole underside with gray, losing the bird’s signature white chest. Leave the belly mostly uncolored except for soft shading near the wing. The white belly makes the gray back look richer by contrast.
Mistake: Forgetting the white wing bar.
Without the white slash on the folded wing, your sketch looks like an anonymous songbird. Always preserve that patch or apply white pencil firmly over it. It’s the number‑one field mark.
Mistake: Pressing too hard from the start.
Heavy pressure creates a waxy layer that resists additional color. Build color gradually with light, overlapping strokes. You can always add more pigment later, but you can’t remove it easily.
Mistake: Ignoring the eye stripe.
The dark stripe that runs from the beak through the eye defines the mockingbird’s face. Skipping it makes the bird look blank and unrecognizable. Sharpen your dark pencil and draw that stripe with confidence.
Expert Tips for Vibrant Mockingbird Color Art
-
Test your gray blend on scrap paper first. Draw three overlapping gray strokes and adjust pressure until the transition looks smooth, then replicate it on your bird.
-
Keep pencils needle‑sharp for feather edges. A sharp dark pencil creates crisp eye stripes and beak outlines that bring your mockingbird drawing color into focus.
-
Use circular motions for soft belly shading. Tiny circles eliminate harsh stroke lines and mimic the soft, downy feather texture of the breast.
-
Let white pencil do the blending work. Burnish the boundary between gray and white with a white pencil to create a seamless, airbrushed look without damaging the paper.
-
Print two outlines—one for practice, one for final. Experiment with color intensity and layer order on a test sheet. The finished version benefits from your experiments.
Frequently Asked Questions
What colors do I need for a mockingbird drawing color pencil project?
A basic set of four pencils works wonders: a light warm gray for the base, a medium cool gray for shadows, dark charcoal for the eye stripe and tail depth, and white for the belly and wing bar highlights. Add a colorless blender to smooth grain. High‑quality student pencils from any major brand give excellent results without a large investment.
How can I make a mockingbird drawing color for kids that’s easy and fun?
Start with a large, simple outline and just five crayons: gray, white, black, yellow for the eye, and brown for the branch. Encourage kids to color the back gray, leave the belly blank, add a black eye stripe, and then color the branch. Praise effort, not accuracy. Display the artwork proudly. The activity stays short, successful, and motivating.
Can I use watercolor pencils for a mockingbird drawing color?
Absolutely. Lay down dry pencil pigment exactly as you would with regular colored pencils, then lightly activate with a damp brush. This creates soft, natural washes perfect for the breast and wing edges. Use less water on the eye stripe and beak to keep them crisp. Practice on scrap paper first to master water control.
Conclusion
Your mockingbird drawing color journey comes down to three essentials: select a range of grays from light to dark, layer them gently for realistic depth, and always protect the white wing bar and belly. These three habits will turn any outline into a living, breathing bird. Start today by printing a simple outline and gathering your gray pencils. In under 20 minutes, a beautifully colored mockingbird will stare back at you. Which bird will you color next—a cardinal, a blue jay, or perhaps a goldfinch? Share your choice in the comments. And See Our Detailed Guide On These Too.