
Introduction
You’re sitting in a meeting, a lecture, or a conference. The speaker is dropping insights left and right. You’re scribbling as fast as you can, but by the time you look back at your notes, they’re a wall of text—impossible to scan, impossible to remember, impossible to use.
What if there was a better way?
Meet sketchnoting: the visual note-taking method that combines words, drawings, and structure to capture ideas in a way your brain actually wants to remember. And here’s the best part—you don’t need to know how to draw. Mike Rohde, the designer who coined the term “sketchnote,” puts it simply: sketchnoting is about “ideas, not art”.
Research backs this up. Sketchnoting engages what cognitive scientists call “dual coding”—processing information through both visual and verbal channels, which has additive effects on learning and memory. In plain English: combining images with words makes ideas stick.
By the end of this guide, you’ll know exactly how to create your first sketchnote, step by step. No artistic talent required. Just a pen, some paper, and a willingness to try something new.
Background
Sketchnoting—also called visual note-taking—is the creative process of recording thoughts using illustrations, symbols, structures, and text. The term was first coined by Mike Rohde in 2006. Since then, it has grown into a global movement with an active community called the Sketchnote Army.
But sketchnoting isn’t just a trend. The cognitive benefits are well-documented. Studies show that sketchnoting helps students stay engaged, organize their thoughts visually, and boost comprehension and retention. It activates both critical and creative thinking—what researchers call “divergent, holistic thinking” alongside “convergent, analytic thinking”.
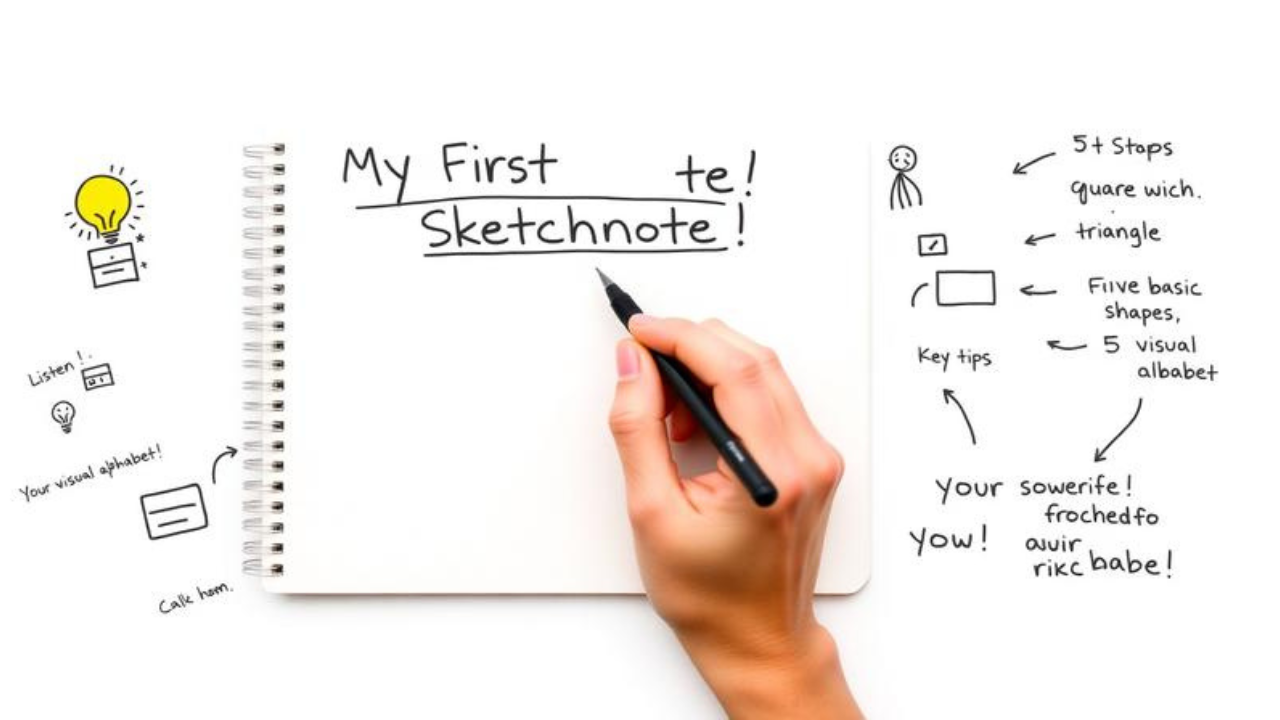
The beauty of sketchnoting is its accessibility. You don’t need fancy supplies or formal training. As one guide puts it: “All you need is paper (or a whiteboard) and something to write with!”. And you definitely don’t need to be an artist—most sketchnotes are built from just five basic components: a dot, a line, a triangle, a square, and a circle.
Main Body
Step 1: Gather Your Tools (Keep It Simple)
Let’s start with the basics. Your sketchnoting toolkit can be as minimal as:
-
Paper: A plain sheet or a sketchbook. Many sketchnoters prefer landscape orientation—turn your page sideways for more horizontal space.
-
A pen: A thin black pen for writing and sketching. Having both a fine and slightly thicker one can be helpful.
-
A highlighter or colored pen: For adding emphasis and visual hierarchy.
That’s it. You probably already have everything you need.
Pro tip: Start with a pencil if you’re nervous. But Rohde recommends using a pen from the start—no erasing forces you to embrace imperfection and keep moving forward.
Step 2: Listen and Process (Don’t Write Everything)
Here’s the biggest mistake beginners make: trying to write everything down.
Sketchnoting isn’t transcription. It’s translation. The goal isn’t to capture every word—it’s to capture the ideas.
The process has four phases:
-
Listening and Experiencing: Pay attention to lists, quotations, repeated phrases, or anything that resonates. If you’re capturing a personal experience, note sensory details.
-
Processing: Instead of taking verbatim notes, process the content. Write only the most important material. Think of yourself as a “thought curator”—it’s better to fully capture one major point than to frantically scribble many lesser ones.
-
Writing: Start putting words on the page. Your handwriting should be fast but legible. Use abbreviations when needed. Remember: sketchnotes don’t have to follow a linear order—you can use any part of the page.
-
Visualizing: During pauses, add shapes, lines, and symbols to the most important sections. This act of revisiting uses visual cues to cement concepts in your mind.
The takeaway: Be selective. As Rohde explains, “once you let go of writing down everything, you become more selective about what you capture—you identify the big ideas”.
Step 3: Start with a Title
This might sound obvious, but it’s one of the most powerful habits you can develop: start every sketchnote with a title.
Your title anchors the page. It tells your brain (and anyone else reading your notes) what this sketchnote is about. Make it big. Make it bold. Use block letters or bubble letters to make it stand out.
Think of your title like a book cover—it sets the stage for everything that follows.
Step 4: Build Your Visual Vocabulary
Here’s where the magic happens. You don’t need to draw like Leonardo da Vinci. You just need a small library of simple icons and symbols.
Sketchnotes are built on simple forms: lines, dots, circles, triangles, and arrows. Rohde describes this approach as “building with Lego blocks rather than fine art drawing”.
Start by practicing these basic shapes. Fill a page with circles, squares, arrows, straight and wavy lines. Then combine them into simple icons—a heart, a light bulb, a beaker, a molecule.
Build your own visual library. Think about the concepts that come up often in your work or studies. Can you turn any of them into simple sketches? A graph, a warning sign, a thumbs-up, a figure in a lab coat. Keep a small notebook and sketch whenever you have a minute—during your commute, while your lunch heats up, in the evening.
Every little drawing session adds to your visual library.
Step 5: Add Structure with Basic Elements
Your sketchnote needs more than words and doodles—it needs structure. Here are the core building blocks:
Text: Your everyday handwriting. It doesn’t have to be tidy—just legible and consistent.
Emphasis Text: Used for headings, titles, and important takeaways. Make it stand out with bold letters, all caps, or bubble letters.
Basic Shapes: Circles, triangles, and squares. Use them as alternatives to plain bullet points, or to mark items of the same category.
Containers: Boxes, speech bubbles, thought clouds, and banners. Use them to group related ideas or emphasize a key point.
Connectors: Arrows, paths, lines, dotted lines. Use them to link related concepts, show flow, or illustrate timelines.
Pro tip: Draw a rectangle around all dates and times. Draw a thought cloud around future goals. These small visual cues make your notes infinitely more scannable.
Step 6: Practice with Low-Stakes Content
Before you sketchnote a high-pressure conference or an important meeting, practice at home.
Rohde recommends using video recordings—like TED talks—to build your skills in a low-pressure environment. Pause the video after each key point. Draw. Reflect. Repeat.
Other great practice exercises include:
-
Sketchnote a typical day in your life
-
Draw how you make toast (great for practicing sequential thinking)
-
Sketchnote a podcast episode
-
Capture the plot of a book or movie you love
The goal isn’t perfection—it’s progress. Each sketchnote you create builds muscle memory and confidence.
Counterargument
Let’s be honest: sketchnoting isn’t for everyone, and it isn’t always the right tool.
Some people find that drawing—even simple doodles—distracts them from listening. If you’re constantly worrying about how to draw something, you might miss the actual content. And research has shown that sketchnoting doesn’t necessarily make note-taking more enjoyable for everyone compared to traditional methods.
There’s also the question of speed. Sketchnoting takes practice. In the beginning, you will be slower than you would be with regular notes. That’s okay—but it’s worth acknowledging.
The nuance: Sketchnoting is a tool, not a religion. It works brilliantly for some people, some topics, and some situations. It doesn’t work for all of them. The key is to use it when it serves you—and put it aside when it doesn’t.
As one experienced sketchnoter puts it: “The practice of sketchnoting is really just a way to learn how to paraphrase, summarize, and refocus to what’s really meaningful”. That’s the real goal—not the drawings themselves, but the thinking they enable.
Actionable Takeaways
-
Start small. Don’t try to sketchnote an entire conference on day one. Practice with a 5-minute TED talk. Build your skills gradually.
-
Use what you have. You don’t need fancy supplies. A pen and paper are enough.
-
Focus on ideas, not art. Your drawings don’t need to be beautiful. They need to be recognizable.
-
Listen first, draw second. Don’t try to do both simultaneously. Listen, process, then capture.
-
Practice your visual library. Spend 10 minutes a day drawing simple icons. Build muscle memory.
-
Embrace imperfection. Mistakes are part of the process. Keep going.
FAQs
1. Do I need to be good at drawing to sketchnote?
No. Absolutely not. As Mike Rohde says, sketchnoting is about “ideas, not art”. Most sketchnotes are built from five basic shapes: dots, lines, triangles, squares, and circles.
2. What supplies do I need to get started?
Almost nothing. A plain sheet of paper (or a sketchbook), a thin black pen, and optionally a highlighter or colored pen. That’s it.
3. How do I know what to draw?
Listen for key concepts, metaphors, and repeated ideas. Then translate them into simple icons. Build a visual library of common symbols over time.
4. What if I run out of space on the page?
Plan your layout before you start. Sketch a rough structure on scratch paper first. If you still run out of space, use arrows to continue onto the next page.
5. How do I sketchnote in real time?
Practice with video recordings first. Focus on listening and processing rather than writing everything. Use abbreviations. Add visuals during pauses.
6. Can I sketchnote digitally?
Absolutely. Many sketchnoters use iPads with apps like Procreate or Notability. The principles are the same—just different tools.
7. What are the biggest mistakes beginners make?
Trying to write everything down, worrying about drawing quality, and not planning a layout before starting. Remember: less is more. Capture the big ideas, not every word.
Conclusion
Sketchnoting isn’t about becoming an artist. It’s about becoming a better thinker.
When you sketchnote, you’re not just transcribing—you’re translating. You’re taking someone else’s ideas and making them your own. You’re distilling complexity into clarity. U’re engaging both sides of your brain in a dance that makes information stick.
The beauty of sketchnoting is its accessibility. You don’t need talent. You don’t need training. U just need a pen, some paper, and the courage to try something new.
So here’s your challenge: find a 10-minute video on a topic you care about. Grab a pen and paper. Turn the page sideways. Write a title. Listen. Process. Draw. And see what happens.
Your first sketchnote won’t be perfect. It shouldn’t be. It’s the first step on a journey—a journey toward notes that actually work, ideas that actually stick, and thinking that actually thinks.
The best time to start was yesterday. The second best time is right now.
Go make your mark.